DISCLAIMER: Parlor City Sound earns a commission (at no cost to you) if you click a link to Amazon and buy something while visiting this page. This is only applicable to Amazon links—we don't earn a sales commission from anyone else. Read our advertising disclosure & FAQ to learn more about our strict policies on affiliate marketing.
We spend a lot of time thinking about how things sound in our home recording studios.But what about how the room itself sounds? Okay … some of you are saying “dude, it’s a room. It sounds like air.” And you’re right, that’s exactly what a room sounds like. Soundproofing and acoustic treatment for home studio recording affect how sound waves move through space. And this will have big implications for the quality of your recordings.
By this point, you might already have a decent understanding of just how expensive home recording can get. And unfortunately, the news on this front isn’t any better. Soundproofing and acoustic treatment for home studio environments will drive up your DIY recording studio spending in big ways, even if you’re doing the labor yourself.
That being said, we can’t overstate just how big of a difference this all makes. An expensive condenser mic in a poorly treated room will sound worse than a low-cost condenser in a room with great acoustic treatment. It’s important for the sake of your overall sound quality that you put some serious thought (and money) into soundproofing and acoustic treatment.
Acoustic treatment vs soundproofing
Before we dive in here, there’s a long-trunked animal with big ears in the room we should address first. Soundproofing is not the same as acoustic treatment, and acoustic panels—those foam pads you see mounted on walls in recording studios—don’t actually help soundproof a room. Like, not even a little.
Soundproofing refers specifically to reducing the volume of sound waves that can pass through a wall, ceiling, or floor. It’s all about keeping outside sounds out of the space so they don’t show up on your recordings. Oh, and preventing your neighbors from poking voodoo dolls of you in the crotch. That’s definitely a significant perk, too.
Acoustic treatment refers to treating the acoustics of the interior space so that sound waves are absorbed or reflected properly. Anything from installing carpet to utilizing foam panels or wooden diffusers falls into the realm of acoustic treatment, not soundproofing.
It may seem like we’re just being snooty with language here, but the distinctions between soundproofing and acoustic treatments are incredibly important as you improve the acoustics of your studio.
Do you need to soundproof? Because money. Money is hard.
Let’s preface this with a disclaimer: if you don’t really need to soundproof your studio, don’t. It’s flippin’ expensive, even if you’re handy with DIY projects and you’re doing it yourself.
If you live in an area with traffic, neighbors, airplanes flying overhead, etc., then soundproofing is necessary. In the one hand, you’re keeping those unwanted noises out of your recording projects. And in the other, you’re not being a selfish jerk and irritating everyone within earshot of your recording space. Both of these are great excuses to do some soundproofing.
If you live out in the sticks or if the room is pretty quiet already, you might not want to throw all of this money toward soundproofing your space. If you aren’t bothering neighbors or if you’re neighbors aren’t bothering you, soundproofing might be more expensive than it’s worth, at least for amateur or semi-professional recording spaces.
Most of us, however, are going to need to put some planning into this soundproofing project. You’ll need to source materials, rip up walls, and try to think ahead to future needs in the process. So don’t grab that sledgehammer and start whacking drywall just yet. Read this guide and others you find online and really give all of this some serious contemplation before you begin. You may even want to buy a book or two on soundproofing. There’s no such thing here as too much advice!
How sound travels, and what happens when sound hits a surface
Have you ever noticed how sound travels less when it’s snowing outside? Everything sounds a bit muted and muffled, doesn’t it? There are a few reasons for that, and they all relate to how sound moves through the air. Sound moves quickly and easily through open air away from its source. And like water, it’ll seek out the path of least resistance as it moves. Sound bounces off surfaces and tumbles around until it eventually peters out.

When the white stuff is coming down, sound waves run into a zillion tiny obstacles, and whatever isn’t absorbed by these porous flakes gets bounced off to the next flake. Sound has a difficult time traveling through it. The same happens when it’s raining out. You just don’t notice it as much, because the weather itself is noisy. Sound doesn’t travel as far because there’s all this wet or frozen stuff in the way.
When sound hits a surface, the surface absorbs the sound, reflects it, or both. The sound that gets absorbed is either neutralized or passes through that surface, having lost a bit of steam in the process.
Have you ever been so angry you’ve screamed into a pillow? Oh, you haven’t? Uh … no, I haven’t done that either! But let’s say we did do that. Your screams of frustration don’t travel as far because the pillow is absorbing most of those waves. And the ones that get through are so weakened they can’t make it much further.
Sound waves vibrate through the air, too. That means they’re going to vibrate any surface they come in contact with. It’s the basis of how your microphones, guitar pickups, and drum heads all work. Soundproofing is also about thwarting those vibrations.
Building a soundproof wall
There are countless soundproofing techniques you can utilize here. And what you should use really depends on your budget, how much space you have, and the layout of the room(s) you’re working with. But here are some of the most common options:
- Add insulation material that’s resistant to sound waves, like Rockwool, Owens Corning wool insulation, or Greenfiber cellulose
- Add sound barrier material, like Auralex SheetBlok
- Use two or even three layers of heavy drywall, preferably with its own frame anchored to the studs of the main wall
- Create “walls within walls” with air gaps between them. Having two walls is better than one. And leaving an air gap between those two walls reduces vibrations from directly transmitting from one surface to the next.
- Use acoustic glue or caulk on gaps, drill and nail points, and wall frames. Many experts use it between layers of drywall, too. This is especially good at reducing lower vibrations from bass cabs and kick drums.
It’s time to start thinking about cable management
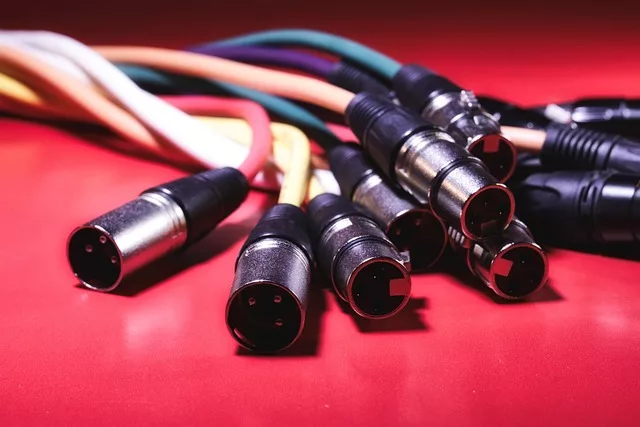
In an ideal space, you’ll have a live room where musicians are performing, and a separate control room where your equipment is located. Not all of us have that sort of space available, of course. But if you do, you’re presented with another issue: how do you run cables between the two rooms without letting sound through?
You can use an analog stage snake and a small hole through the wall with offset ends. We’ve seen this done by simply using two L-shaped PVC corner pipes connected. Run the snake cable through, and then stuff the ends of the tube as best you can with foam or a similar material. It’s not perfect, but it generally works.
If your budget has some extra give, you could set up an audio network. With an audio network, you’re simply running an ethernet cable between the two rooms. You’d have a digital snake in the live room and an audio interface or digital mixer in the control room. You can then install ethernet ports in your walls. But audio networks like AVB and Dante are more expensive than old-school stage boxes. That extra cost might be better spent elsewhere in your studio setup.
Do you need a studio window?
We’ve all seen photos and videos from inside professional recording studios. There’s supposed to be a window between the live room and the control room, right? But how is that done when keeping the rooms soundproof and isolated is so important?
Traditionally you’d use two separate panes of thick glass or plexiglass (12mm to 15mm is ideal), with several inches (8 to 12 inches, or more) of air between them. The pane in the live room side would then be angled slightly. Some engineers have both panes angled, and some don’t angle them at all.
Another option is to hook up a pair of cheaper flat-screen televisions in each room with webcams attached to each. In some situations, this is actually cheaper than installing a pricey control room window. This option is nifty, but there will usually be a tiny bit of video lag to contend with. Plus, you’re using up important power outlets. It’s cool, but not entirely practical.
Then again, you don’t really need a studio window. It’s certainly useful, but if all of this is sounding needlessly expensive, it’s okay to not have one. A lot of what needs to be communicated can be done through talkback. Or you could even just use a pair of propped-up smartphones and set up a video call!
What about the doors? The things you walk through, not the band
There is of course a big glaring hole in this soundproofing design: the door! And it’s a huge pain to deal with, too. One that can get very expensive.
The cheapest solution is of course the simplest. Use a heavy door with a floor sweep on the bottom. Try to block it off as best you can without creating a fire hazard.
The more professional option is ridiculous and expensive: create a sort of airlock using two heavy doors opening away from each other, with the walls, floor, and ceiling as soundproof as the rest of the studio. This will not be cheap, but the results will be top-notch. If your studio is laid out so your live room is accessed from the control room, the control room itself can even serve as your airlock.
Acoustic treatment for home studio spaces
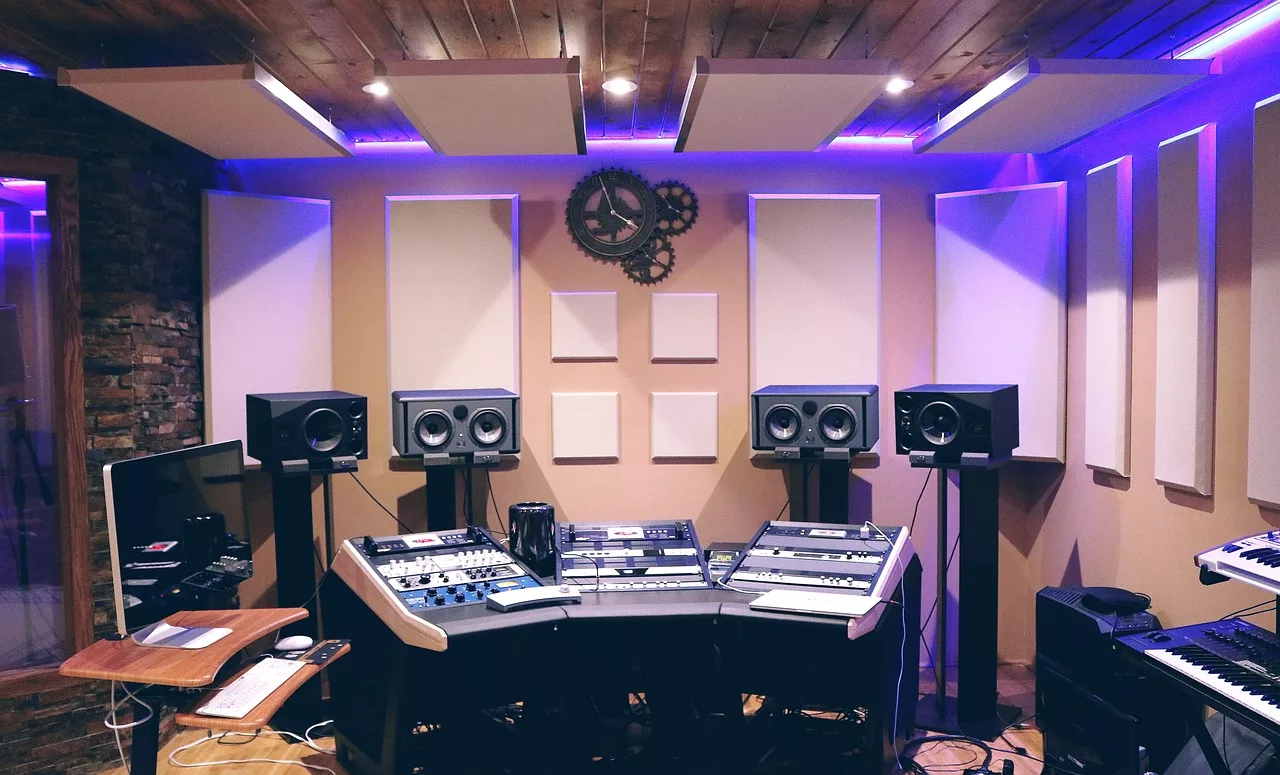
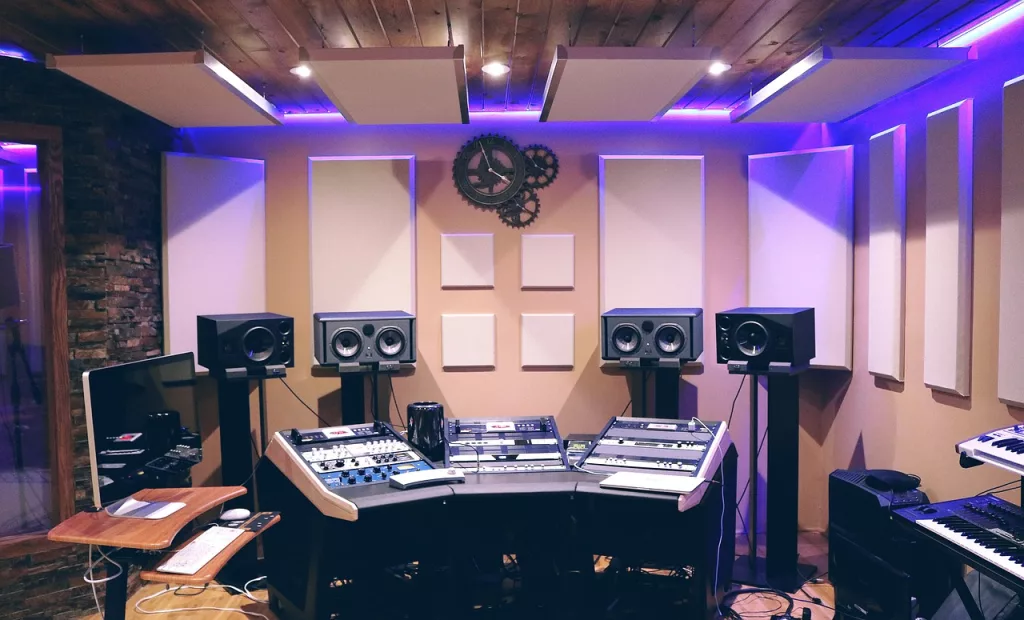
We’ve finally come to the bit about those acoustic treatment panels. Like we said before, acoustic treatments don’t do much to aid soundproofing. But they do help you improve the sound of a room, controlling how sound waves move through it. Acoustic treatment for home studio spaces is essential!
Spend enough time around sound engineers, and you’ll end up hearing the phrases “live room” and “dead room.” A live room is one where there’s more naturally-occurring reverb, while a dead room has less or close to none. Vocal booths and drum booths are usually dead rooms.
On a tighter budget, consider going for what I refer to as a “zombie room.” It’s dead, but with just enough naturally-occurring reverb to spice things up. If the room’s acoustics are managed well, it can sound really great in your mixes.
Bass traps
Low sound frequencies tend to run along walls until they reach the four corners of the room. And like a singing, dancing street gang from the 1950’s, those low frequencies are going to congregate in those corners and cause trouble. The solution? Bass traps!
Bass traps, also known as corner wedges or corner fills, are set in the four corners of the room. When those lower frequencies show up looking to start a fight, the bass traps absorb or reflect them. This can go a long way toward preventing your recordings from sounding muddy, flat, thin, or all of the above.
Some engineers swear by using flat panels angled over the corners. You might want to try that if you have some acoustic panels to spare (more on those imminently). You’ll also find triangular bass traps, designed to go in the tops and bottoms of the room’s four corners. Those eight corners getting neutralized will go a long way toward deadening the room.
Absorption acoustic panels
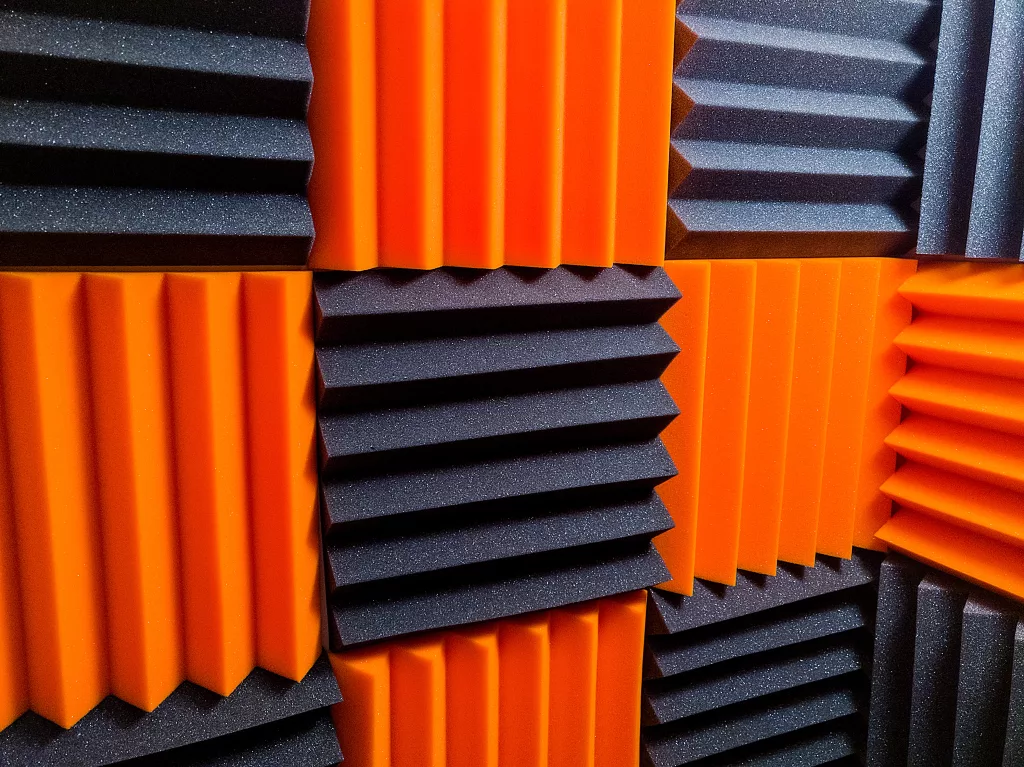
Think about how sound waves move through a room. They spread from their source outward, hit the walls, and then bounce around, causing reverb. To stop that reverb from happening, we use acoustic panels (also known as studio foam or studio panels).
Acoustic panels are stuck on the walls and ceiling where the bulk of sound waves are going to land. They’re made of porous material that sops up a lot of those sounds. And their shapes reflect what’s left in minimal ways. Together, these absorption and reflection methods can stop reverb dead in its tracks.
More acoustic panels usually results in a more “dead” room. You’ll see engineers using tons of absorption acoustic panels in vocal booths, where you want as little natural reverb as possible. In your control room, you should think of your studio monitors as sound sources and use panels behind, above, and alongside them.
MORE: How to record drums in a home recording studio
Diffusor acoustic panels
Whereas an absorption panel attempts to stop sound waves from reflecting, diffusor panels do almost exactly the opposite. They help reflect sound waves in more directions than they would naturally. This can enhance the natural reverb of a room while still softening the sound waves by spreading them out wider.
Having said that, they’re a pretty expensive acoustic treatment for home studio recording environments. They should only be used when you’re supplementing the room’s sound. We wouldn’t recommend grabbing diffusors until you have a better understanding of how sound moves through your home recording studio.
Acoustic treatment for home studio construction is complicated (and expensive)
Reading through this article, the two points we keep driving home are that soundproofing and acoustic treatment for home studio recording environments is incredibly complicated and brutally expensive. So for most of us building home recording studios, we need to ask some big questions. How much is enough? How much is overkill, and how can we get this project completed without selling any internal organs?
If your home recording studio needs soundproofing, we recommend doing that before you start thinking about acoustic treatments. Acoustic panels/ studio foam are a lot easier to stick to a wall than to remove later on, and it’s very easy to damage them (or the wall itself) when trying to strip them. We definitely recommend soundproofing first if your budget allows it.
Knowing how sound waves move through a room, you could set up temporary low-cost alternatives while recording. When you can afford soundproofing and acoustic treatment later on, you can cross those bridges then.
- Use pillows as bass traps/ corner fills
- Use heavy blankets or towels and hang them up where acoustic treatments might go
- Cover up windows with heavy blankets
We suggest reading lots of articles and books and watching some videos on the subject to enhance your understanding. It’s difficult to find one source of information that has all of the answers. That’s as true in home recording studio construction as it is in any facet of life. But we hope this article at least got you started. Soundproofing and acoustic treatment for home studio environments is a huge, complicated subject. If you have any questions, hop on Facebook and let us know!

