DISCLAIMER: Parlor City Sound earns a commission (at no cost to you) if you click a link to Amazon and buy something while visiting this page. This is only applicable to Amazon links—we don't earn a sales commission from anyone else. Read our advertising disclosure & FAQ to learn more about our strict policies on affiliate marketing.
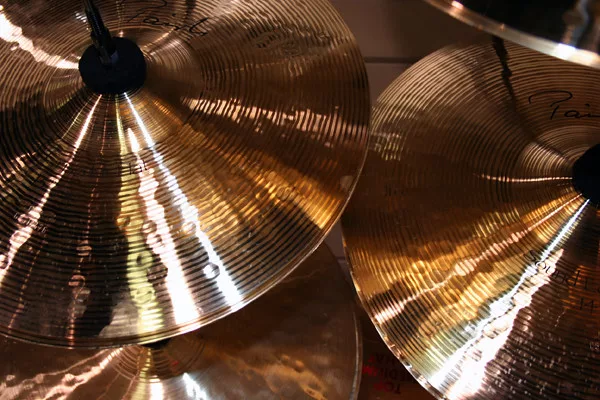
Figuring out how to clean cymbals can get pretty nerve-racking. Your cymbals are expensive—we’re talking hundreds of dollars each. So this isn’t exactly the time or the place for trial and error. The last thing you want to do while cleaning cymbals is damage them.
The Internet is overflowing with all sorts of wacky ideas for cleaning cymbals, from dousing them with ketchup to using some magical snake oil. And while some of these methods do actually work to clean cymbals, there are easier, cheaper, and honestly less smelly ways of getting the job done.
Dirty cymbals will sound darker and won’t resonate like they do when they’re clean. They can even get rusty and crack if they’re not taking care of properly. And depending on what metals are in use, dirty cymbals can start turning green over time, and nobody wants green cymbals, right? So let’s learn how to clean cymbals and get them looking vibrant again. It’s usually pretty easy and super cheap, too!
Cleaning cymbals 101
First off, you should understand that the best time to clean cymbals is all of the time. Keep a microfiber cleaning cloth near your kit and get in the habit of cleaning your cymbals whenever you play. Simply give them a wipe with the dry cloth to remove dust, drumstick debris, and fingerprints. Doing this regularly will limit (or maybe even eliminate) the need for deeper cleaning.
On that note, if you’re not using your cymbals, bag them up. If you don’t already own a cymbal bag, we recommend getting one and putting your cymbals away whenever you won’t be playing for an extended period. Going out of town for a week or longer? Using a different cymbal set while recording or going on tour? Put the unused ones in a cymbal bag to keep them from getting dusty.
Good to know: What’s an ideal humidity level for musical instruments?
How to clean cymbals when they’re too dirty for a simple wipe-down
A dry microfiber cloth is a great tool for cleaning cymbals regularly. But if your cymbals are looking grubbier—they haven’t been cleaned in a long time, or some jerk spilled beer on them, or what have you—we’re going to have to up the ante. And thankfully, deep-cleaning cymbals is actually pretty easy and affordable.
There are loads of retail cymbal cleaning products on the market today. Groove Juice, Buckaroo, Lizard Spit, Dunlop Formula 65, and Music Nomad Cymbal Cleaner all work pretty well. Just be sure you look at the intended use of cymbal cleaners. Some are more of a polish than a cleaner, and as we’ll discuss shortly, not all cymbals should be polished.
When cleaning cymbals, always make sure they’re fully dry afterward. Moisture and metal cymbals don’t mix! Leaving your cymbals wet can result in discoloration, warping, and rust. So take the time to dry them thoroughly whenever you’re using cleaning products or water.
Cheaper alternatives for cleaning cymbals
Looking for a cheaper option to clean cymbals with? There’s one very simple household cleaning formula that works on nearly everything. Car upholstery, aluminum siding, children’s toys, wooden desks, moldy bounce houses, you name it. A simple blend of water, vinegar, and dish soap will clean just about anything.
Put some warm water and white vinegar in a large bowl. Add a few drops of original Dawn dish soap (the unscented kind). Swirl it around a little, and then rub that liquid onto your cymbal with a clean rag. You could use a soft-thistle brush or a toothbrush if there’s an especially stubborn spot. Rub a bit harder in areas that are especially mucky. When you’re done, rinse your cymbal and dry it thoroughly.
You’ll find loads of advice online on how to clean cymbals and what methods work best. Some people swear by using ketchup or squirting lemon juice on them, and others will even suggest more harmful “solutions” like using Brasso or Windex (seriously, don’t use Brasso or Windex on cymbals). The ketchup and lemon tricks do get passable results, but the good ‘ole water-vinegar-dish soap combo is tried and true, and less likely to leave your precious cymbals smelling like a Coney Island hot dog stand.
How to polish cymbals (only if they have a brilliant finish!)

We should take a moment to point out that knowing how to clean cymbals and knowing how to polish cymbals aren’t quite the same thing. And unless your cymbals have a brilliant finish, polishing them can do a lot more harm than good.
That said, polishing cymbals is usually a pretty straightforward (and physically demanding) process. As a general rule it’ll involve cleaning the cymbal, coating the cymbal in special cymbal polish using a rag, letting it sit for a while, and then vigorously rubbing it clean with a different rag. But make sure you follow the cymbal polish manufacturer’s instructions. They may have different and/ or additional steps.
Again, we want to stress that you should only polish cymbals that have a brilliant finish. And while polish will do a bit of cleaning, it’s always a good idea to clean brilliant cymbals before polishing them. So even if every one of your cymbals has a brilliant finish, you’re still going to want to know how to clean cymbals either way.
We strongly recommend buying professional cymbal polish for your brilliant cymbals. Again, you’ll find loads of advice online on how to polish cymbals with household products, but cymbal polish isn’t all that expensive to begin with. Replacing a cymbal because some untested method did damage? That’s expensive!
There’s not much involved in knowing how to clean cymbals
Knowing how to clean cymbals is pretty straightforward. Keep them clean with a microfiber cloth. For deeper cleaning, use a combination of warm water, vinegar, and dish soap. Only polish cymbals with a brilliant finish, and always follow the manufacturer’s directions. That’s pretty much it, in a drum nut shell.
We hope you enjoyed this article and will explore some more Parlor City Sound guides when you’re up for it. You drummers might be especially interested in reading our guide on how to record drums in a home recording studio!


