DISCLAIMER: Parlor City Sound earns a commission (at no cost to you) if you click a link to Amazon and buy something while visiting this page. This is only applicable to Amazon links—we don't earn a sales commission from anyone else. Read our advertising disclosure & FAQ to learn more about our strict policies on affiliate marketing.
Figuring out how to record drums effectively in a home recording studio can be a huge pain in the rear. Drum kits have a lot of components, and capturing all of that sound means you also need a lot of microphones. Oh, and did we mention you need inputs for all of those mics? Yeah … that part isn’t fun either. There are no two ways about it: learning how to record drums is hard. In fact, a drum kit is the most difficult instrument you’re going to record, hands down.
A drum kit runs the full spectrum of sound frequencies, from the low thud of a kick to the crack of a snare drum to the loud, high-pitched explosion of a crash cymbal. The mics are all close enough together to cause phasing issues, a problem you may have never even heard of before now. And getting everything to sound balanced and level can be difficult too. The struggle when recording drums is very real.
Add onto this the fact that drums form the backbone of the song. Recording them isn’t as forgiving of small mistakes as other instruments. And we don’t say all of this to scare you out of doing it, of course. We just want to prepare you for the tough road that lies ahead. There will be a lot of experimentation. A lot of mics getting repositioned by millimeters to get it just right.
This guide from Parlor City Sound aims to simplify this process as much as possible. We’ll help you find the best drum mics for each job, walk you through drum mic placement, and then get into the act of actually tracking (recording) it all. This will be a very long article, so let’s get right to it and explain how to record drums in a home recording studio.
Tune your drums. We mean it!
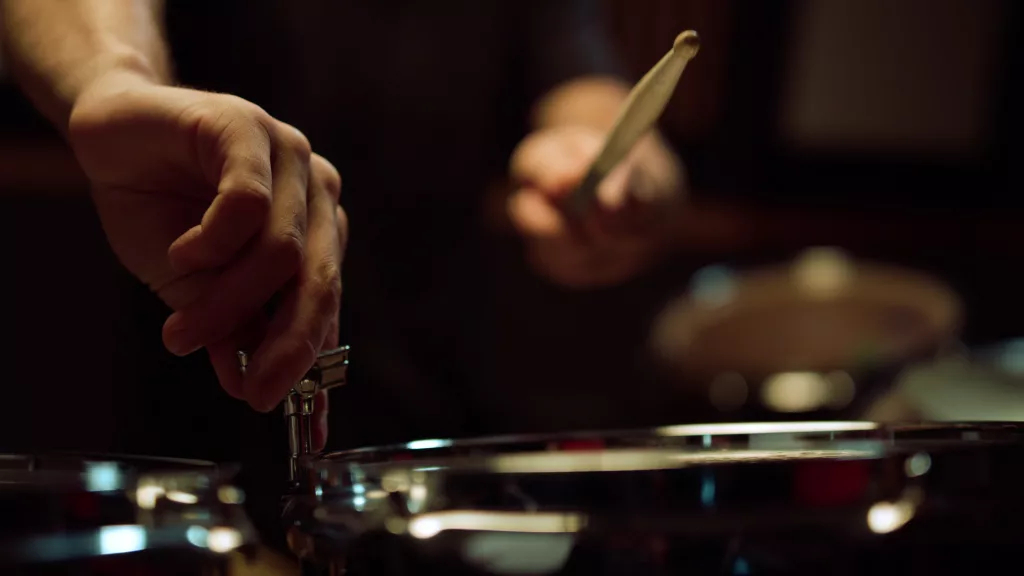
Okay, drummers … we need to have a talk. Before you record, you need to tune your drums properly. I know, I know. But you really do.
You can take a poorly-tuned drum kit into one of the world’s leading professional recording studios, with a top-notch veteran engineer taking the helm and miking your kit personally. But if the kit isn’t tuned properly, it’s still going to sound crummy.
Use new (or relatively new) drum heads and tune them correctly before you start miking the kit. It’s better to do this before you start setting up drum mics than after. You don’t want to have to move those mics to get at the lugs later. That can change the mic placement just enough to alter the consistency of your recordings. And yes, that’s how fickle this process can be!
How to mic drums for recording
There’s really no one answer when it comes to how to mic drums for recording. There are probably more methods of miking drums than there are makes, models, and sizes of drums overall. All the different types of mics for drums, drum mic placements, angles, the general sound of the room … it never ends!
How many mics you use will boil down to your budget and the sound you’re going for. So to cover as many bases as possible, let’s go from using a single microphone to miking a whole drum kit.
How to record drums with one mic

Some home recording studio engineers (and even some professional ones) have miked full drum kits using just a single microphone. Some even prefer recording drums with a single mic, arguing it eliminates phase issues (more on that shortly) and gives the drums more of a live sound. So let’s take a look at how to record drums with one mic.
First off, there’s the drum mic selection. You should read our beginner’s guide on recording studio microphones to learn more about mics in general, but for this job, we recommend using a large diaphragm condenser mic, like an AKG P120 or an Audio Technica AT4040. You might already be using a large diaphragm condenser if you’re recording vocals, acoustic guitars, etc.
There are multiple methods of recording drums with one mic. Here are some of the more popular options:
- Option A—The “halo” overhead method: center your mic directly over the drummer with the polar pattern aimed generally down, at the kit. Experiment with heights ranging from two to five feet.
- Option B—Set up the mic three to four feet in front of the kit and a few feet above it, angled toward the snare drum
- Option C—Position the mic three to four feet in front of the kit, centered between the top of the kick and the undersides of the cymbals, aiming straight at it
How to record drums using a pair of overhead drum mics
If you can invest a little more into your mics, we suggest getting a pair of small diaphragm condenser mics to use as drum overheads. These mics can be used on other instruments too, like acoustic guitars and pianos, so it’s an all-around good investment.
One of the most legendary drum sounds of all time used nothing more than a pair of Beyerdynamic mics hung up at the top of a stairwell over a Ludwig drum kit. Led Zeppelin’s When the Levee Breaks did a lot with just a couple of overheads very, very high up.
Overheads will capture a lot more of your kit than a single mic can, and with more detail too. But how best to use overheads is open to experimentation and an almost unhealthy dose of debate. Here are two popular options:
- The spaced pair method: The mics are spaced out to pick up the two halves of the kit. We suggest parking one mic over the floor tom and angled slightly toward the ride, with the other mic positioned over the snare and aimed slightly toward the hats. Angling them is on par with busting ghosts: don’t cross the streams. And by “streams” we mean polar patterns.
- The X/Y Method: The two mics are put close together in a “V” shape over the drummer’s head, which eliminates (or at least greatly reduces) potential phasing issues.
As for small diaphragm mics, you have a lot of options. On a tight budget, we recommend picking up a matched pair of Behringer C-2 mics for around $50. More expensive (and frankly better) options include the AKG P170, Audio Technica PRO 37, Sennheiser e614, Rode NT-5, Audio Technica AT4041SP, and the renowned favorite of many professional engineers, the Shure SM81.
How to mic a kick drum
If you can expand out to include two more mics, we suggest miking your kick and snare next. We’ll start with the kick, because overhead miking tends to leave the kick drum underserved.
first up, how to mic a kick drum. For kick drums, you can set your microphone outside of the resonant head, or inside the kick through its sound hole (if it has one). The closer you set the mic to the inside of the batter head, the “more clicky” the kick sound will get. For “boomy” kick sounds, move the mic closer to, or outside of, the resonant head.
What kind of mic do you use for a kick drum? A $60 Behringer C112 will do the trick here when you’re pinching pennies. If you can afford a nicer mic, try the AKG Perception P2, Audix F6, Shure Beta 52A, Sennheiser e902, AKG D112, or the pricey-but-worth-it Telefunken M82. You can use any of these mics on your bass amp or cab, too!
How to mic a snare drum

Next, let’s look at how to mic a snare drum. For the snare, set the mic outside of the rim, two or three inches above it, and aiming toward the center of the batter head. Some engineers mic the underside of the snare drum instead, while others mic both sides. You’ll want to experiment with mic placements to see what works best for you in terms of sound.
Your inevitable next question: What mic do you use for a snare drum? There’s one answer that comes immediately to the mind of most engineers—the legendary Shure SM57 is easily the undisputed king of the snare drum mics. You’ll find this inexpensive microphone taking on hefty mileage in AAA studios the world over, as well as countless home recording studios.
Other great options for snare drum mics include the Sennheiser e604 and e609, the Audio Technica ATM230 and ATM650, and the Telefunken M80-SH.
Miking your hi-hats
To mic the hats or not to mic the hats. That is the question. And it’s a question everyone seems to have a different opinion on, too. Some people say miking the hats makes the kit sound more dynamic and expressive. Other people think it’s a waste of a mic and can lead to potential phasing issues for no good reason.
It’s a matter of personal preference, but we recommend miking the hi-hats. It fills out your stereo field more, and potential phasing issues can be mitigated by toying with the mic placement a little. Worst-case scenario, you have an extra microphone, and there’s really no such thing as having too many mics when recording. If your budget can make space for it, give it a shot.
Speaking of mics, we suggest using either an SM57 or a small diaphragm condenser mic on hi-hats. You may have extra SM57 mics on hand anyway, so it doesn’t hurt to pop one on your hats. Small diaphragm condensers arguably sound better, but you can’t go wrong one way or the other. If you’re buying a new condenser just for your hats, consider a cheaper option than what you’re using for overheads. An AKG P170 or an Audio Technica PRO 37 will work.
As for mic placements, you’ll want to set your mic up above or below the hats. Position the mic close to where the stick lands, and experiment with aiming closer to or further from that area.
Last but not least, miking your toms
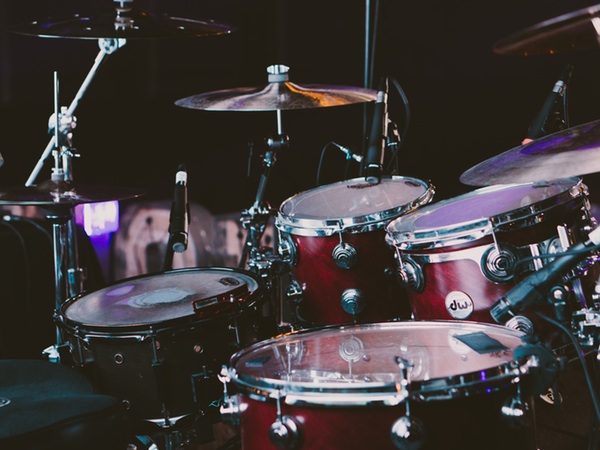
Some sound engineers prefer miking toms, and others don’t. It really boils down to how frequently the toms are getting used and what they’re contributing to the overall sound. But as a general rule, we prefer miking toms rather than not.
We need to preface this with a bit of a disclaimer: Miking up your toms can be a pain. You’re adding a lot of microphones into the mix, significantly increasing the risk of encountering phasing issues. More mics also mean more of an investment. Not just in the mics themselves but in getting a bigger audio interface or even a mixer to connect them all. Having said that though, let’s go over how to mic toms.
You should mic each tom individually, similar to how you miked your snare. Aim the mic toward the center of the tom. As a general rule, miking closer to the head will give you a tighter sound. If you’re more limited on microphones or inputs, you could put the mic between two toms and slightly elevated to pick up both with a single mic.
Countless recordings have used workhorse SM57 mics on toms, though there are many options, like the Sennheiser e604, that clip directly onto the drum’s rim. You can buy e604s in packs of three and they’re a solid, reasonably-priced choice for studio and live applications.
What is mic phasing? And what does ‘phase cancellation’ mean?
Mic phasing is a hugely complicated subject, but here’s a quick and oversimplified rundown. Mic phasing occurs when two microphones are capturing identical or near-identical sound sources. When the sound waves line up too closely together, they end up audibly canceling each other out, hence this often being referred to as “phase cancellation.” This can leave your source sounding tinny, thin, or otherwise just a bit “off.”
To hear mic phasing in action, park two microphones next to each other and then record yourself speaking. Now, mute or disconnect one of those microphones and try it again. When you play those tracks back, they’ll sound slightly different. That difference you’re hearing is phase cancellation. The two signals are matched, so some of their frequencies cancel each other out.
Avoiding phase cancellation can be challenging at times, especially when you’re trying to figure out how to record drums cleanly. You have a lot of microphones spread out across your drum kit, and they’re all going to pick up the same stuff in different ways. This is part of why some engineers prefer recording drums with just one or two mics … it tends to be a bit easier.
The best way to combat mic phasing is to prevent your mics from picking up identical sounds. Use the varying polar patterns of each mic to your advantage and try to visualize where each mic is gathering sound from. If you’re hearing phase—it’s not always easy to detect, mind you!—try moving your mics around, angling them differently, or spacing them further apart. Panning can sometimes limit phasing too.
Finding a good audio interface for drums
Now that we’ve gone over how to mic a drum kit, we need to figure out how to record drums with a computer. That means all of those analog microphone signals need to be converted to digital signals. For this job, we’re going to need AD/DA conversion, where “A” means analog and “D” means digital. That’s where our audio interface comes in!
An audio interface or “AI” turns analog signals from your microphones into digital signals your computer and DAW software can understand. It can also turn your computer’s digital signals back into analog signals, so your computer monitors and headphones can use them. We have a guide discussing audio interfaces that explains all of this in more detail, and lists some great options to check out as well.
If you’re using just a few microphones, finding an audio interface to use when recording drums won’t be much of a challenge. Most of these devices come with two, four, or eight analog inputs (usually XLR, TRS, or both). You’ll have no problem at all finding an audio interface to suit your needs. But if you need more than eight analog inputs, things get a lot more complicated.
What if I want more than eight analog inputs?
A lot of home recording studio engineers recording full bands are going to want more than just eight analog inputs. What if you’re miking a larger drum kit with nine or more microphones? What if you want to live track a fully-miked band all at once? Or what if you simply don’t want to deal with the hassle of constantly unplugging XLR cables and plugging in different ones?
There aren’t a lot of audio interfaces on the market today that offer more than eight analog inputs, not without getting into expensive and complicated digital networks. The Behringer AIR XR18 has 16 XLR/TRS inputs and converts at 48 kHz/ 24-bit, and will set you back around $740. The Roland Studio Capture has 12 analog inputs, but converts at 192 kHz/ 24-bit. That unit costs around $900. The $950 Mackie Onyx24 has 24 analog inputs, 18 of which are XLR with preamps, and converts at 96 kHz/ 24-bit. That one is very hard to beat in terms of inputs, sample rate, and general functionality for less than $1,000.
Alternatively, you could pair up a smaller (and cheaper) audio interface with an analog mixer. Our guide on audio interfaces vs. mixers explains this in more detail.
Panning, EQ, and compression
We’ll soon have guides on mixing, mastering, panning, equalization, compression, and more (our site is still young!). For now, we just wanted to offer a brief disclaimer: don’t use panning, EQ, or compression during your tracking/ recording process unless you’re addressing a very specific issue.
Panning and EQ get exceptions here, especially if you’re sending premixed signals to an audio interface. You’ll want to pan out your drums to fill a stereo field, rather than running them dead center and making them sound like a sludgy mess. We recommend starting by keeping your kick and snare dead center, then panning out your hats, toms, and overheads as if they’re in the room with the listener.
Remember, all of your instruments—not just the drums—need to occupy the stereo field as well. Vocals, guitars, keys, etc. will end up getting panned during mixdown too, and you should avoid keeping too much sound in any one space.
EQ and compression should be used during mixdown and mastering, but you should do so gingerly. Think in terms of clarity rather than color—you’re not trying to make the sources “sound better” so much as you want to make them “sound cleaner.” Remember, your studio mixers and professional-grade closed-back headphones will sound one way, but someone listening on earbuds, a car stereo, a Bluetooth speaker, or computer speakers will hear it another way. If you want a particular tone, achieve it through drum tuning, guitar tone, etc.
Recording drums is always an adventure
Learning how to record drums involves a lot of trial and error. As we explained in this article, you need to experiment with just about everything and fine-tune the sound until you’re happy with the final product. That takes a lot of time, but it’s genuinely worth the effort. A great drum sound can go a long way toward driving home a professional-grade sound for the whole project.
Here are a few parting tips for how to record drums:
- Use your phone’s camera to snap photos of mic placements and knob settings, especially when you find something that works.
- Use a tape measure to figure out your mic placements more precisely, and jot everything down. There’s nothing worse than breaking everything down for a gig and coming back to a disheveled studio where you can’t quite get your levels right again.
- Despite what some of the internet’s denizens might tell you, mic cables don’t really make a huge difference until you’re spending a lot of money on mics and preamps. Mogami Gold cables are great, but they stop mattering when your cheaper-quality stage snake cabling isn’t on par with them.
We hope all of this information helps you learn how to record drums effectively and efficiently. Please check out some of our other guides at Parlor City Sound designed entirely to help you make better music. We hope you’ll browse them and enjoy some more of our stuff!
